Zwift FTP Test — How to Prepare and Which Test to Pick
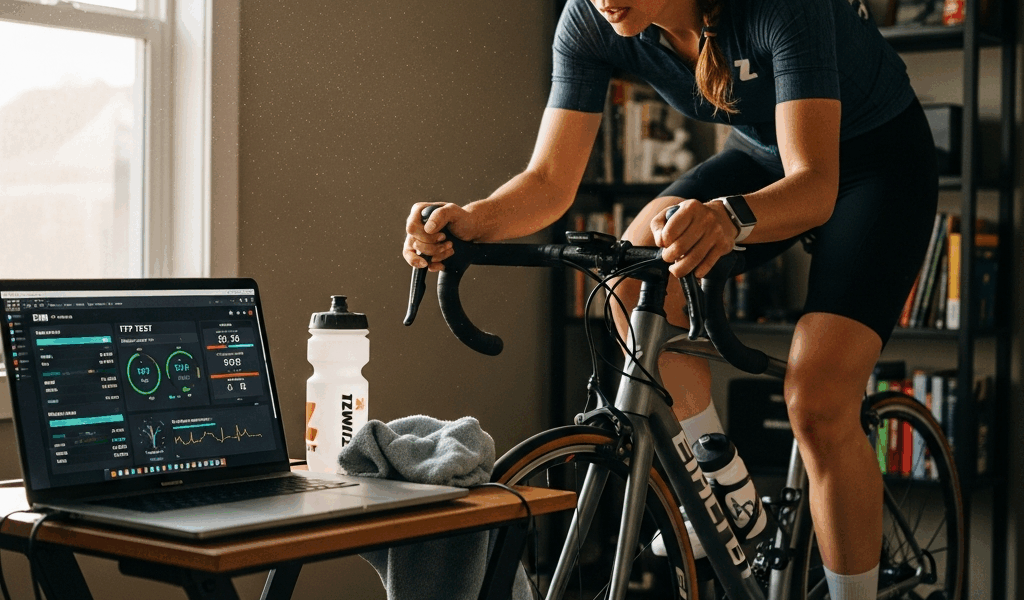
If you’re searching for how to prepare for a Zwift FTP test, you’ve probably already made the most common mistake once — hopped on fresh off a hard week, gone out too hot in the first five minutes, and ended up with a number that felt either embarrassingly low or suspiciously high. I’ve done both. The FTP test isn’t technically complicated, but the preparation window matters more than most guides admit, and picking the wrong test format for where you are right now can skew your training zones for months. This article is about fixing that before you pin your next test date on the calendar.
Which Zwift FTP Test Should You Take?
Zwift offers two main FTP test options inside the workout library: the Ramp Test and the 20-Minute FTP Test. There’s also an older 2×8-minute protocol floating around in custom workout files, but the two you’ll see under “FTP Tests” in the Training menu are the Ramp and the 20-Minute. Choosing wrong doesn’t ruin your training, but it does introduce noise into an already imprecise measurement.
Ramp Test — Best For First-Timers and Returning Riders
The Ramp Test is exactly what it sounds like. Power starts low and increases by 20 watts every minute until you can’t hold the target anymore. Zwift then takes 75% of your best one-minute power as your FTP estimate. The whole thing takes somewhere between 15 and 25 minutes depending on your fitness level, and the math does most of the pacing work for you.
If you’ve never tested before, use the Ramp Test. Full stop. Here’s the specific scenario where it wins: you’re a newer rider, maybe six months into structured training, you’ve never done a sustained 20-minute maximal effort, and you have no reliable idea what pace you can hold. The Ramp Test removes the guesswork about pacing. You just keep pedaling until you genuinely can’t hit the next watt target. The psychological load is manageable because each minute feels like a separate challenge rather than one long decision.
It also suits riders coming back from a break of more than four weeks. Your fitness has shifted in ways you can’t fully predict from memory, and the incremental format gives you an honest read without requiring you to have a gut sense of your current ceiling.
20-Minute FTP Test — Best For Experienced Riders
The 20-Minute test involves a 10-minute warmup, a 5-minute all-out effort to pre-fatigue your fast-twitch fibers, a 5-minute recovery, and then 20 minutes at the highest sustainable power you can hold. Zwift multiplies your average 20-minute power by 0.95 to get your FTP estimate.
This format is more accurate for experienced riders who have a reasonably calibrated sense of their own effort ceiling. The 5-minute blowout segment before the test interval is doing important work — it suppresses the neuromuscular contribution so your 20-minute result reflects aerobic capacity more cleanly. Riders who skip the 5-minute effort or half-effort it tend to go out too hard in the test interval and collapse in minutes 12 through 16.
The 20-minute test rewards pacing discipline. If you’ve been training consistently for a year or more, you know what a hard sustained effort feels like, and you’ll get a more granular result than the Ramp Test’s 75% formula provides. Probably should have opened with this section, honestly, because most people asking which test to pick are actually experienced enough for the 20-minute but default to the Ramp because it sounds easier. It isn’t easier. It just has a lower cognitive entry cost.
48-Hour Prep Protocol
The 48 hours before your test matter more than the test itself. I learned this the hard way after testing on a Tuesday following a hard Sunday group ride and a moderate Monday recovery spin. The FTP number I got was 18 watts below what I’d hit four weeks earlier. No illness, no change in fitness — just insufficient recovery. Here’s what the prep window should actually look like.
Rest and Ride Quality Leading Up to Test Day
No hard rides in the 48 hours before the test. That means no intervals, no threshold work, no Zwift races (which are secretly interval sessions in disguise). You can ride easy — genuinely easy, meaning Zone 1 or low Zone 2, under 65% of your current FTP — for 30 to 45 minutes the day before. This keeps your legs from going stiff without accumulating fatigue. But if you’re tired, skip it. An extra day of rest costs you nothing.
Sleep matters. Seven to nine hours the night before. This isn’t a wellness platitude — your perceived effort during the test is directly sensitive to sleep quality, and the 20-minute test especially requires you to make continuous decisions about pace under accumulated discomfort. Tired brains give up earlier.
Hydration and Nutrition
Drink more water than you think you need in the 24 hours before the test. A good benchmark is pale yellow urine by the afternoon before test day. This isn’t hydration science — it’s just not starting dehydrated. For the meal before the test, eat roughly two to three hours beforehand. Something with moderate carbohydrates, low fat, low fiber. I typically have two slices of toast with almond butter and a banana around 90 minutes before a morning test. Simple, digested quickly, enough glucose in the blood without feeling heavy on the bike.
Caffeine timing is specific and worth planning. If you use caffeine regularly, take it 30 to 45 minutes before the test begins. A single espresso or 100mg caffeine tablet is enough. The research on caffeine and cycling performance is one of the more robust areas in sports science — it genuinely blunts perceived exertion during hard efforts. If you never use caffeine, don’t introduce it for the test. A novel stimulant response in an already high-stress physiological situation is unpredictable.
Fan Setup and Environment
Set up a direct fan before you start. Not a ceiling fan, not a floor fan pointed at the ceiling — a box fan or a Lasko 20-inch directional fan (about $35 at most hardware stores) aimed at your chest and face from roughly three feet away. Core temperature is the primary limiter in sustained indoor efforts past 15 minutes. Without a direct fan, you’ll see your power drop in the back half of the 20-minute interval for thermoregulation reasons, not fitness reasons. Your FTP number will be artificially low.
Room temperature should be between 60°F and 68°F if possible. Opening a window in a cool room is often enough. Some riders use two fans — one at the front, one at the side. Overkill for most, but genuinely useful if your pain cave gets warm quickly.
ERG Mode and Gear Selection
This is where a lot of riders make a subtle but significant setup error. The answer is simple: turn ERG mode off for FTP testing.
Why ERG Mode Works Against You in FTP Tests
ERG mode — the setting on smart trainers like the Wahoo KICKR Core or Tacx NEO 2T that automatically adjusts resistance to match a target power — is excellent for structured workouts. For FTP testing, it’s counterproductive. In the 20-minute test, ERG mode will try to hold you to a predetermined power target rather than letting you express your actual capacity. If your FTP is set too low coming into the test, ERG will cap your effort. If it’s set too high, ERG will spiral — the trainer cranks resistance as you slow, you slow more, resistance increases further, and you end up in the dreaded “ERG death spiral” before the test interval even hits its stride.
The Ramp Test in Zwift manages the increasing power targets automatically and is specifically designed to work with ERG mode on — Zwift controls the resistance ramp itself. But the 20-minute test should be done in Resistance mode or Slope mode with ERG disabled. In Zwift, you can toggle this by pressing the “E” key on a keyboard or through the mobile companion app during the workout.
Gear Selection Strategy
Frustrated by spinning out or grinding in resistance mode, I spent one full test in a gear combination that made cadence control nearly impossible. Don’t do this. For slope or resistance mode FTP testing, use your small chainring and a middle-range cassette cog — something like a 34×17 or 36×19 depending on your drivetrain. This gives you enough resistance at 85-95 rpm cadence to produce meaningful power without requiring you to push a massive gear that taxes your neuromuscular system more than your aerobic system. Keep cadence between 85 and 95 rpm for the bulk of the test interval.
If you’re on a direct drive trainer, slight slope percentage adjustments in the Zwift companion app can tune the feel. Three to five percent slope in slope mode is a reasonable starting point for most riders in the 150 to 300 watt range.
Pacing the 20-Minute Test
Bad pacing ruins more FTP tests than bad fitness. The mistake is universal and predictable: you feel good in minute one, you push above your target, you feel great in minutes two and three, you’re still slightly above target in minute five, and then minutes eight through twelve are a slow-motion collapse that you spend the final eight minutes surviving rather than performing.
The 95% Start Rule
Start at 95% of your target power, not 100%. If you’re guessing because you have no prior baseline, start conservatively — treat the first five minutes as a calibration phase, not a performance phase. The goal of the opening five minutes is to arrive at minute six feeling like you could hold the effort indefinitely. You won’t be able to, but that’s the sensation you’re aiming for.
Build gradually. From minute five to minute ten, you can nudge power up slightly if your breathing is controlled and your legs feel manageable. Minute ten is your decision point — if you feel genuinely good, commit to pushing. If you’re already struggling to maintain, hold exactly where you are and grind out the second half. Going slightly too hard from minute ten onward is recoverable. Going too hard from minute one is not.
Mental Pacing Markers
Break the interval into four five-minute blocks in your head. Block one: conservative and controlled. Block two: find your ceiling. Block three: commit and hold. Block four: everything you have left. This framing helps because the 20-minute effort is genuinely uncomfortable by minute fourteen, and having a mental structure prevents the urge to quit from feeling like a rational response to the situation.
Focus on cadence and breathing rather than power output in the final five minutes. Power will fluctuate. Cadence and breathing rhythm are things you can actively control, and keeping them stable keeps your output stable.
What Your FTP Number Means for Training
Once Zwift calculates your FTP, it automatically updates your training zones. This number is the linchpin of every structured workout in the platform. A workout prescribed at 88% FTP means something specific when your FTP is accurate. When it’s off — high or low — the entire workout structure shifts in ways that either leave you undertrained or chronically overcooked.
Understanding the Zones Zwift Uses
Zwift uses a seven-zone model based on the Coggan power zones. Zone 1 is active recovery (under 55% FTP). Zone 2 is endurance (56-75%). Zone 3 is tempo (76-90%). Zone 4 is threshold (91-105%). Zone 5 is VO2 max (106-120%). Zone 6 is anaerobic capacity (121-150%). Zone 7 is neuromuscular power (above 150%). Most structured training plans spend the majority of time in Zones 2, 3, and 4. The accuracy of your FTP determines whether a “threshold” interval is actually threshold work or secretly Zone 3 cruising.
When to Retest
Retest every six to ten weeks. Six weeks if you’re in an intensive build phase and your workouts are starting to feel consistently too easy. Ten weeks if you’re in a base phase with lower intensity volume. Don’t retest more frequently than every four weeks — fitness adaptations in the aerobic system take weeks to consolidate, and testing too often introduces variability without signal.
If you finish a Zwift structured plan and the final week felt significantly easier than the first, retest before starting the next plan. Starting a new training block with an outdated FTP means the prescribed intensities won’t match your actual physiology. You’ll be doing Zone 3 work when the plan intends Zone 4. Weeks of training drift in the wrong direction before you notice.
One practical note: don’t retest the week after a race, a high-volume weekend, or when you’re fighting off any kind of illness. The test is a measurement tool, not a performance event. The goal is the most accurate number you can produce under controlled conditions — and controlled conditions require recovery, preparation, and a honest respect for what the test is actually asking your body to do.


Stay in the loop
Get the latest cycle train central updates delivered to your inbox.